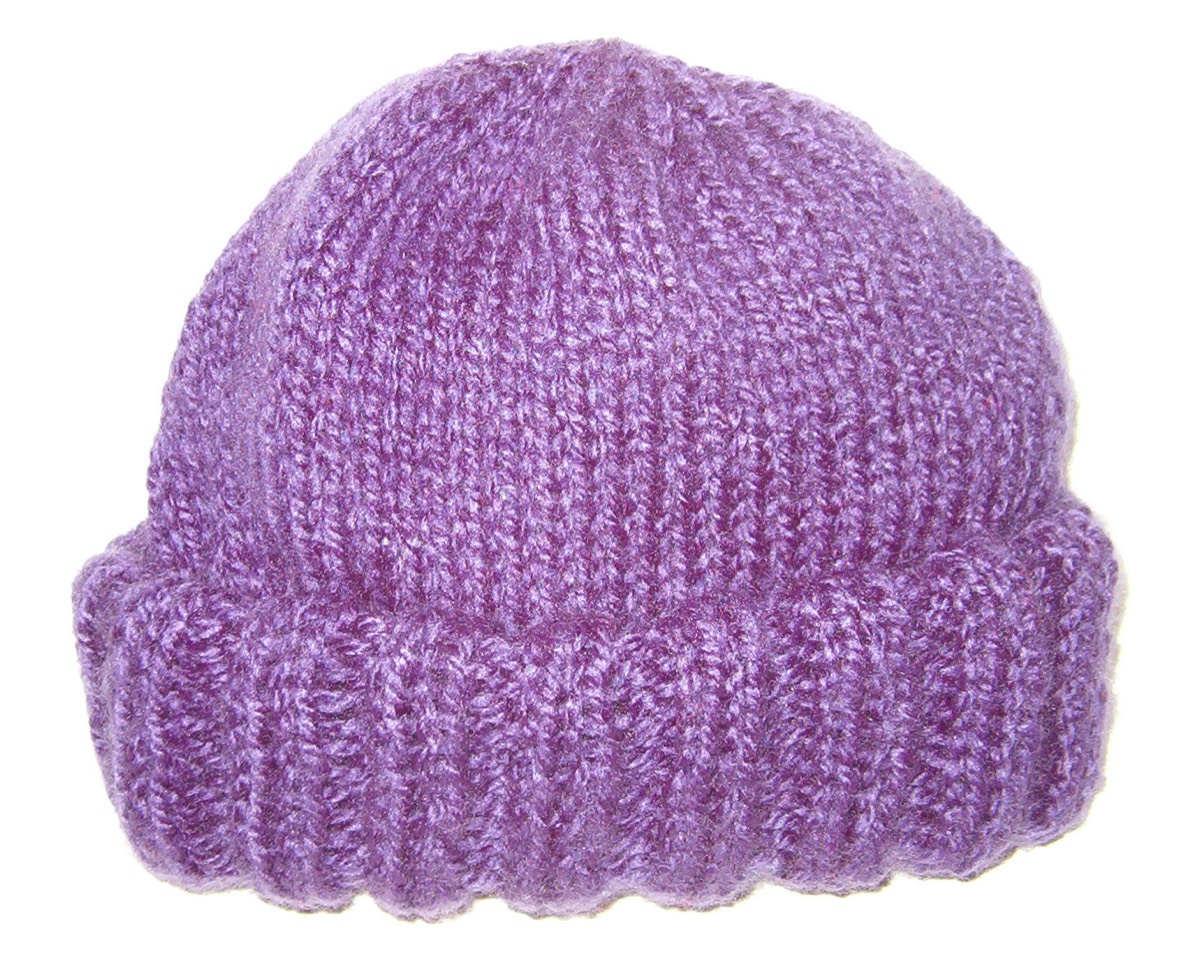
Stacks Image 11

Messmerland Advanced-Beginner Knitting PatternsĀ©

  • Newborn Baby Cap and Booties

    Materials:

    Size 6 knitting needles, 1 skein of baby yarn, fingering yarn, or sport yarn, and a sewing needle for yarn.

    Directions for Booties (Make Two):

    Cast on 34 stitches and work in garter stitch for 12 rows (6 ridges).
    Instep Shaping: Row 1: K 15, K2 tog twice, K 15 (32 sts)
    Row 2: K 14, K2 tog twice, K 14 (30 sts)
    Row 3: K 13, K2 tog twice, K 13 (28 sts)
    Row 4: K 12, K2 tog twice, K 12 (26 sts)
    Row 5: K 11, K2 tog twice, K 11 (24 sts)
    Row 6: K 10, K2 tog twice, K 10 (22 sts)
    Work K2, P2 ribbing for 12 rows. Bind off loosely in ribbing. Seam back and bottom of booties.

    Directions for Cap:

    Cast on 62 stitches. Row 1: K2 , P2. Row 2: P2, K2. Repeat these two rows for 5 inches. (This allows enough length for a cuff.) End with a wrong side row.
    Decrease in the following manner: Row 1: (right side) K2 tog, P2 tog. Repeat across row.
    Row 2: P1, K1 across.
    Row 3: *K2 tog across row from *.
    Row 4: P2 tog across. You should have 8 sts left. Cut yarn, leaving a 24-30 inch tail.

    Finishing:

    Thread the yarn needle with the tail of the yarn and draw the yarn through the remaining 8 sts twice. Pull the yarn to form the crown of the cap. Seam down the side of the cap. (Hint: Remember to reverse the seam for the cuff.) Weave the remaining yarn into the seam for about an inch and trim. A small pom-pom may be added to the top of the cap.


    Messmerland Advanced-Beginner Knitting Pattern ©2007. Messmerland Patterns are free; not for commercial use.

    Stacks Image 249
  • "Chunky" Hat

    Materials:

    Size10 and 11 knitting needles, 1 3 ounce skein of chunky weight yarn, and a sewing needle for yarn.

    Directions:

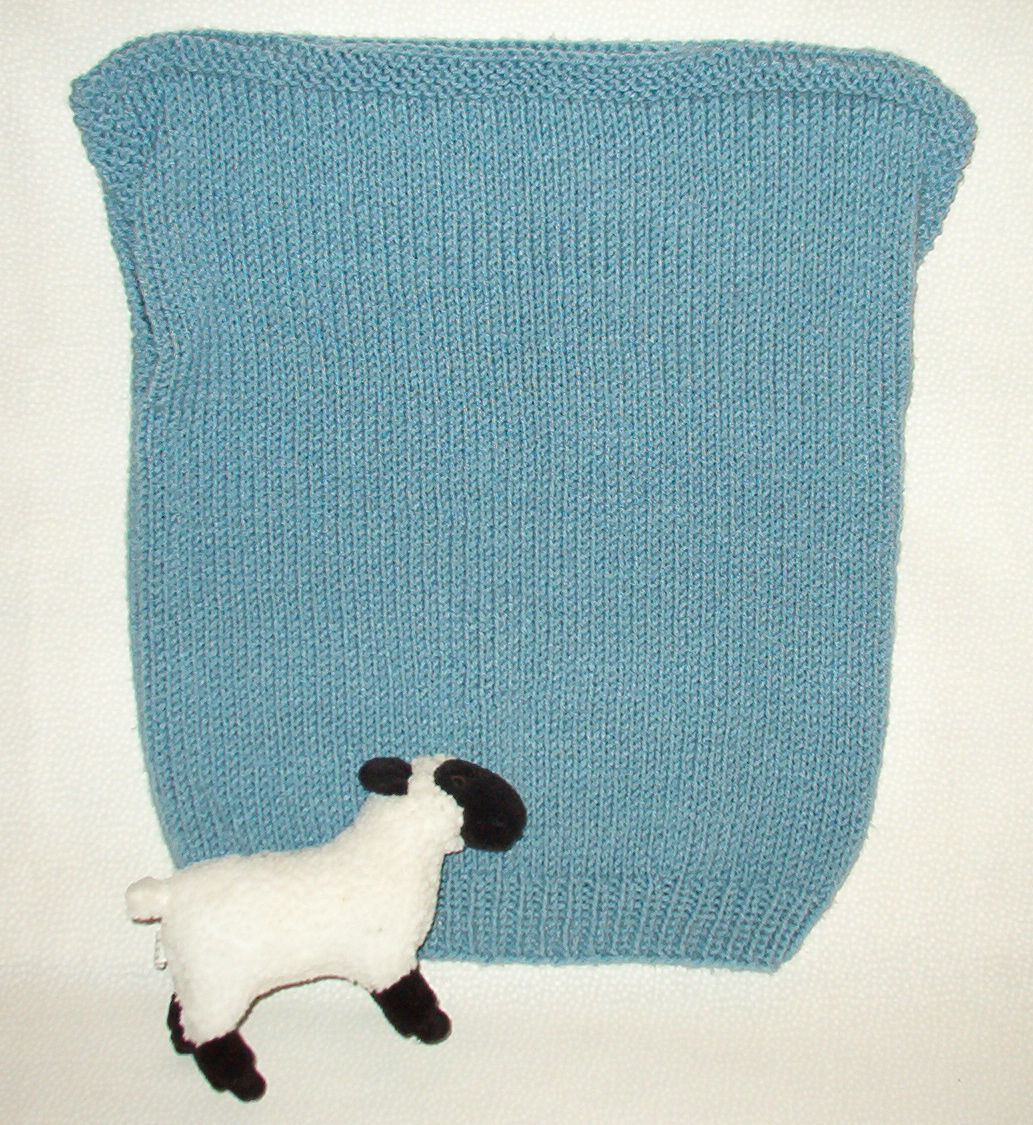
    Cast on 70 stitches on the size 11 needles. K2, P2 ribbing for 9 inches.
    Change to size 10 needles and knit 1 row, purl 1 row for 5 inches of stockinette st. (The hat will measure 14 inches from top to bottom.)
    On a right side row, K2 tog across entire row.
    Next row (wrong side) purl across. Repeat these 2 rows twice more. Cut yarn, leaving a tail 36 inches long.

    Finishing:

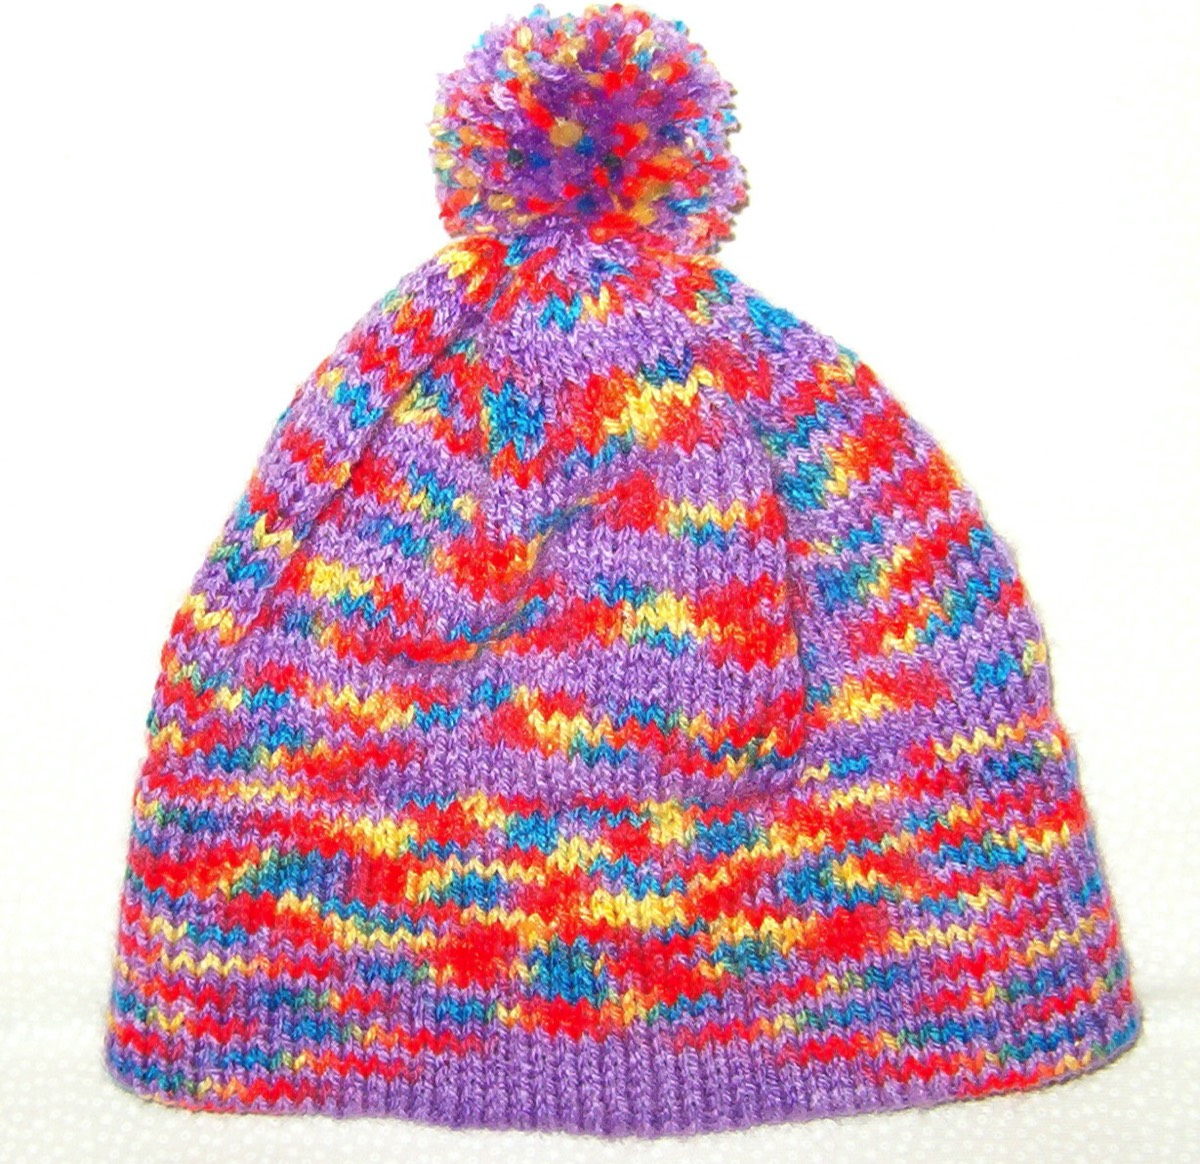
    Thread the yarn needle with the tail of the yarn and draw the yarn through the remaining sts on the size 10 needle twice. Seam down the side of the hat. (Hint: Remember to reverse the seam for the cuff.) Weave the remaining yarn into the seam for about 2 inches and trim. Fold up the brim of the hat. A small pom-pom may be added to the top of the cap.


    Messmerland Advanced-Beginner Knitting Pattern ©2007. Messmerland Patterns are free; not for commercial use.

    Stacks Image 251
  • Christmas Stocking

    Materials:

    Size 10.5 knitting needles, 1ounce of worsted weight yarn for the main color, a small amount of contrasting worsted weight yarn, a size "G" or "F" crochet hook, and a sewing needle for yarn.

    Directions:

    Cast on 50 stitches. Knit one row; purl one row. Continue in Stockinette st. (K 1 row; P 1 row) increasing 1 st. at the end of each of the next 8 rows.
    Continue in Stockinette st for 4 more rows.
    Decrease 1 st at the beginning of each of the next eight rows of stockinette st. (50 sts.)
    Cast off 10 st at the beginning of the next 2 rows.
    Work in Stockinette st on remaining 30 sts for 6.5 inches. End with a wrong side row (Purl should be the last row you complete.)
    Tie in the contrasting color and K 1, P 1 (ribbing) for 6 rows.
    Bind off in ribbing, leaving a tail of yarn 36 inches long.

    Finishing:

    Thread the yarn needle with the tail of the yarn. Fold inside-out and sew or crochet the seam from the bottom of the foot to the top of the stocking.
    Crochet a loop using two strands of yarn (chain 25 sts.) Attach the loop to the stocking.


    Messmerland Advanced-Beginner Knitting Pattern ©2007. Messmerland Patterns are free; not for commercial use.

    Stacks Image 287
  • Knitted Slippers

    Materials:

    Size 7 or 8 knitting needles, 2 skeins of worsted weight yarn (3 ounces each), and a sewing needle for yarn. (Hint: choose 2 colors which will be knitted together throughout the project to create a pleasing design, or you may use the same color for both skeins.

    Directions(Make Two):

    Using two strands of yarn held together, cast on 32 sts, leaving a tail 20" long.

    Heel End of Slipper:
    Begin on wrong side. Wrong side rows: K10, P1, K10, P1, K10.
    Right side rows: K across. (Hint: it is helpful to put markers on the needle on either side of the right side row purl stitches, so you will remember to purl them. Only purl these 2 sts on the right side row. They will form a fold line on either side of the bottom of the slipper.)
    Continue in this manner until the piece is 21 ridges long, or until you reach the ball of your foot.
    (Adjust the length of the slipper by increasing or decreasing the number of ridges in this section. This pattern is for Ladies' sizes 6 to 8.)
    Toe End of Slipper:
    Work 13 rows in K1, P1 ribbing.
    Next row: Sl 1, K1, PSSO ( pass the slipped stitch over the knit stitch), across the row. This is a way to decrease the stitches by half. Cut the yarn leaving a tail about 24" long.

    Finishing:

    (Hint: I like to put the first slipper on a holder, or an unused knitting needle while I make the second slipper. This helps me get both slippers the same size.)
    Thread the yarn needle with both strands of yarn and draw the yarn through the remaining sts twice, pulling tightly. Sew the top of the slipper along the ribbing edge. Sew the back of the slipper in the same way. Make two matching slippers. Put big pom-poms on the insteps, if desired.


    Messmerland Advanced-Beginner Knitting Pattern ©2007. Messmerland Patterns are free; not for commercial use.

    Stacks Image 285
    Stacks Image 334
  • Vest

    Materials:

    Sizes 8 and 10.5 knitting needles, 8 ounces of worsted weight yarn, safety pins, and a sewing needle for yarn.
    Gauge:
    14 stitches to 4 inches on size 10.5 needles in stockinette st.
    Finished size fits 29 in. chest and has a length of 20 in.

    Directions:

    Back:
    With smaller needles, cast on 56 sts. Work in ribbing (knit 1 row, purl 1 row) for 10 rows.
    Increase 1 stitch each end of last rib row. (58 sts.)
    Change to larger needles and work in stockinette stitch for 48 rows.
    Cast on 2 sts. at the beginning of the next 2 rows.
    Continue back in stockinette stitch, but begin and end each row with 4 knit stitches. (K4, knit 52, k4 on right side; k4, purl 52, k4 on wrong side.)
    Continue until there are 16 ridges on the side edges.
    Knit 5 rows.
    Bind off 56 stitches.

    Front: Work the same as the back.

    Finishing:

    Thread the yarn needle. Pin the front to the back with right sides facing. Be sure to match the seams carefully. Sew the side seams together along both edges. Match and pin the shoulder seams in the same manner. Remember to leave enough room to get the vest over your head, and sew the shoulders seams to match. Turn right side out.


    Messmerland Advanced-Beginner Knitting Pattern ©2007. Messmerland Patterns are free; not for commercial use.

    Stacks Image 281
  • Big Needle Scarf

    Materials:

    Size 17 knitting needles, worsted weight yarn (6-8 oz.) or multiple thinner yarns knitted together as one , and a sewing needle for yarn. (This is a great pattern for using up odd balls of yarn.)

    Directions:

    Cast on 15 stitches.
    K every row in Garter stitch. (Hint: Every now and then make a double row by wrapping the yarn twice around the needle for each stitch in the row. On the next row, put the needle through the double wrap and knit the stitch normally. This creates a long stitch row which looks very interesting in the scarf.)
    Continue until piece measures approximately 40 inches in length.
    Bind off very loosely.

    Finishing:

    Weave the remaining yarn tails into the piece so the project will not unravel. You may add fringe to the narrow ends of the scarf, if you like.


    Messmerland Advanced-Beginner Knitting Pattern ©2007. Messmerland Patterns are free; not for commercial use.

    Stacks Image 289
  • Catnip Fish Kitty Toy

    Materials:

    Size 6 knitting needles, 1 ounce of worsted weight yarn, 18 inches of contrasting colored yarn for eyes, polyester stuffing, and a sewing needle for yarn. (A small amount of dried catnip is optional.)

    Directions:

    (BODY MAKE 2)
    Using yarn for body, cast on 14 sts. Be sure to leave a length of yarn at least 10 inches long at the start.
    Row 1: P (purl) across row.
    Row: 2: K (knit) 2 tog (together) in back of stitches, K across row to last 2 sts, K 2 tog (left to right).
    Rows 3, 5 and 7: Repeat row 1.
    Rows 4, 6 and 8: Repeat row 2. (There should be 6 sts at end of row 8.)
    Row 9: P across row.
    Row 10: Make inc (increase) in first st, K across row, make inc in last st.
    Row 11, 13 and 15: Repeat row 9.
    Rows 12, 14 and 16: Repeat row 10. (There should be 14 sts at the end of row 16.)
    Row 17: P across row.
    Row 18: K across row.
    Rows 19, 21 and 23: Repeat row 17.
    Rows 20 and 22: Repeat row 18. ( You should still have 14 sts.)
    Row 24: K 2 tog (in the back of the sts); K to last 2 sts; K 2 tog (left to right).
    Row 25: P across.
    Rows 26, 28, 30 and 32: Repeat row 24.
    Rows 27, 29, 31 and 33: Repeat row 25. (There should be 4 sts left.)
    Using tapestry needle, thread yarn through the remaining 4 sts and fasten yarn tightly leaving a length of yarn 24 inches long. Using the contrasting yarn, stitch an eye on each fish half.

    Finishing:

    Pin two body pieces right sides together with outside edges matching. Use the tapestry needle and one 24 inch length of yarn left at the “nose” of the fish to stitch row ends on one side of the fish together. Leave the yarn left at the tail of the fish hanging there for later. Use the other 24 inch length of yarn at the “nose” of the fish to stitch the other edge together. Turn the body right side out and stuff firmly with polyester filling inserting a little dried catnip in the center. Stitch the tail closed and tie knots in the remaining strands of yarn to secure the opening and to have some dangling strings for the cat to play with.


    Messmerland Advanced-Beginner Knitting Pattern ©2007. Messmerland Patterns are free; not for commercial use.

    Stacks Image 291
  • Bean Bag Baby Bed

    Materials:

    Size 8 knitting needles, 2 ounces of worsted or sport weight yarn, a small amount of stuffing for pillow,and a sewing needle for yarn.

    Directions:

    Pillow Front: Cast on 30 stitches. Knit 4 rows in Garter Stitch. (Continue to knit the first 2 stitches and the last 2 stitches in each row (Garter st) for the entire piece.) Work center 26 sts in Stockinette st (knit one row; purl one row) keeping 2 sts on either edge in Garter st, for 3 inches.
    Pillow Fold Line: K 10 rows in Garter st.
    Pillow Back: Work in Stockinette st for the same number of rows as the front, end with a WS (wrong side) row. Knit 4 rows in Garter st.
    Back of Bag: Work in Stockinette st for 5 inches.
    Bag Fold Line: Knit 10 rows in Garter st. Front of Bag: Work in Stockinette st until piece measures the same as the front of the bag. Work 3 rows in Garter st.
    Cast off. Leave a length of yarn 36 inches long.

    Finishing:

    Thread the yarn needle with the tail of the yarn. Fold the body on the fold line and sew the side seam. Fold Pillow on fold line and sew 2 of the 3 sides. Sew remaining side. Stuff with a small amount of stuffing. Weave in the remaining ends of yarn.


    Messmerland Advanced-Beginner Knitting Pattern ©2007. Messmerland Patterns are free; not for commercial use.

    Stacks Image 293
  • Knitted Cotton Dish Rag

    Materials:

    Size 7 or 8 knitting needles, 1 ball of worsted weight cotton yarn, and a sewing needle for yarn.

    Directions:

    Cast on 4 stitches and work in garter stitch for 3 rows.
    Row 4: K2, yarn over (YO), K to the end of the row. (Hint: yarn over means to knit a stitch with the yarn coming from the front of the work as if purling. The yarn goes over the needle as the new knit stitch is made. In the next row, this YO is knitted, creating a decorative hole and adding another stitch to the piece.)
    Continue repeating these 2 rows until you have 49 sts.
    Next row: K1, K2 tog, YO, K2 tog, K to end of row. (Hint: you are now decreasing 1 st on each row, while maintaining the decorative holes.)
    Continue in this manner, until you have 5 sts left.
    K1, K2 tog, K2. Bind off, leaving a 9 inch tail.
    Use the sewing needle to weave the end of the yarn into the piece so it won't unravel. Trim the excess tail.


    Messmerland Advanced-Beginner Knitting Pattern ©2007. Messmerland Patterns are free; not for commercial use.

    Stacks Image 299
  • Rolled-Hem Hat

    Materials:

    Size 10.5 knitting needles, 3.5 ounces of worsted weight yarn, and a sewing needle for yarn.

    Directions:

    Cast on 66 sts.
    Knit one row, Purl one row for stockinette st. Repeat the last 2 rows 13 times more ( 28 rows).
    To shape the crown of the hat, you now decrease as follows:
    1st row: k1, * k6, k2 together. Repeat from * to last stitch, k1. You should now have 58 stitches on the needle.
    2nd row and all even rows: Purl.
    3rd row: k1, * k5, k2 tog. Repeat from * to last stitch, k1. (50 sts)
    5th row: k1, * k4, k2 tog. Repeat from * to last stitch, k1. (42 sts)
    7th row: k1, * k3, k2 tog. Repeat from * to last stitch, k1. (34 sts)
    9th row: k1, * k2, k2 tog. Repeat from * to last stitch, k1. (26 sts)
    11th row: k1, * k1 k2 tog. Repeat from * to last stitch, k1. (18 sts)
    13th row: k1, * k2 tog. Repeat from * to last stitch, k1. (10 sts)
    14th row: Purl. (last row)
    Cut yarn, leaving a tail of yarn 30 inches long.

    Finishing:

    Thread the yarn needle with the tail of the yarn and draw the yarn through the remaining 10 sts twice. Seam down the side of the cap. (Hint: Remember to reverse the seam for the cuff.) Weave the remaining yarn into the seam for about an inch and trim. Roll lower edge up to desired depth of hat.


    Messmerland Advanced-Beginner Knitting Pattern ©2007. Messmerland Patterns are free; not for commercial use.

    Stacks Image 315
  • Teddy Bear

    Materials:

    Size 5 or 6 knitting needles, 2 ounces of worsted weight yarn, two or three buttons, a regular needle and thread for sewing the eyes on, stitch holders or large safety pins, stuffing, and a sewing needle for yarn. Note: If a small child will play with this toy, do not use buttons for eyes. Use a small amount of a dark color to sew the eyes on the bear.

    Directions:

    Body: Cast on 12 sts for one leg. Work in stockinette stitch for 2 and 1/4 in. Place stitches on a holder.
    Make second leg to match. Put both legs on the same needle and work 24 sts across for the body until the piece measures 8 and 1/4 in.
    Bind off at the top of the head on both edges, 2 sts once and 1 st once.
    (18 sts.) You will make the front of the bear by continuing with the same piece of knitting, because the bear folds at the top of the head.

    Now work the second half to match the front. On both sides cast on 1 st once and 2 sts once. Work until piece measures the same as the front to the beginning of the legs. On the right side, knit the first 12 sts. Place the other 12 sts on a holder. Make the leg the same length as the legs you made on the front. Cast off.
    Take the 12 stitches from the holder and finish the other leg to match. Cast off.

    Arms: (Make two.) Cast on 20 sts. Work in stockinette stitch for
    2 and 3/8 inches. Cast off.

    Finishing:

    Sew the buttons on the face of the bear, or embroider the eyes on the face. Fold bear inside-out and pin so sides match. Thread the yarn needle. Sew the bear together leaving a space on one side for stuffing. Turn and stuff.
    Fold the arms inside-out and sew the sides. Turn and stuff. Sew the arms to the sides of the bear. To separate them from the face, sew the ears on the diagonal.


    Messmerland Advanced-Beginner Knitting Pattern ©2007. Messmerland Patterns are free; not for commercial use.

    Stacks Image 317
  • Teddy's Hat and Sweater

    Materials:

    Size 10.5 knitting needles, 1 ounce of worsted weight yarn, and a sewing needle for yarn.

    Directions for Sweater (Make Two):

    Note: Consider the smooth edge of the cast on row as the right side (R.S. row).
    The sweater and hat will fit a 12-14 inch teddy bear or other stuffed animal.

    Back: Cast on 30 sts. K for 9 ridges. On right side (RS) row, bind of 5 sts at the beginning of the row. Bind off 5 sts at the beginning of the next row. With the 20 sts remaining, K for 7 more ridges (14rows) . Bind off 20 sts, leaving a 12 inch tail of yarn.

    Front: Work same as back.

    Shoulder Seams: Put right sides of sweater together and sew 1 inch each side of neck edge to form shoulders. Hide the ends at least 1 inch in the seam sts. Trim excess.

    Right Sleeve: With right side facing you, pick up and K 25 sts along armhole edge.
    K 6 ridges. Bind off leaving a 20 inch tail.

    Left Sleeve: Work same as right sleeve.

    Finishing:

    Fold sweater wrong-side-out along neck edge. Sew sleeve and side seams. Hide ends. Turn sweater right-side-out.

    Directions for Cap (Make Two):

    Cast on 25 sts, leaving a 12 inch tail. K for 2 ridges (4 rows). On the next right side row, K 2 tog at the beginning and end of the row. (This is how you decrease 2 sts)
    K the wrong side row without decreasing. Continue to decrease 2 sts on each RS row until there are 11 sts left on the needle. Bind off remaining 11 sts, leaving a 20 inch tail.
    Note: There should always be an odd number of sts on each finished row.

    Finishing:

    Using the tail ends, with right sides tog, sew the side seams. Sew the top of the hat, leaving enough room for Teddy’s ears to poke through the sides. Turn right- side-out. Make a pom pom and sew to the top of the hat.


    Messmerland Advanced-Beginner Knitting Pattern ©2007. Messmerland Patterns are free; not for commercial use.

    Stacks Image 319
  • Triangular Scarf

    Materials:

    Size 17 knitting needles, worsted weight yarn (6-8 oz.) or multiple thinner yarns knitted together as one , and a sewing needle for yarn.

    Directions:

    Cast on 5 stitches.
    K every row, increasing 1 stitch at the beginning of each row. Continue until piece measures 9 inches in length.
    Increase 1 stitch at each end of every row until the scarf is the desired size. (Hint: you may make the scarf into a shawl by continuing to add yarn. This will mean you will need to increase the amount of yarn you buy to start this project.)
    Bind off very loosely.

    Finishing:

    Weave the remaining yarn tails into the piece so the project will not unravel.


    Messmerland Advanced-Beginner Knitting Pattern ©2007. Messmerland Patterns are free; not for commercial use.

    Stacks Image 321
  • Ski Hat

    Materials:

    Sizes 6 and 8 knitting needles, 2.5 ounces of DK or worsted weight yarn, and a sewing needle for yarn.

    Directions are for size small. Changes for a larger size appear in parentheses:

    Cast on 90 (96) stitches (sts) using size 6 needles. Purl the first row. Continue in stockinette stitch (K 1 row; P 1 row) for 6 inches, ending with a purl row. In the next row, form a double cuff by turning up work to inside so that cast-on sts are directly behind the sts on the needle. Knit the first sts from the needle together with the first loop of cast-on row. Continue in this manner across row until all sts have been knit off together with cast-on sts.

    Change to larger needles. Work even in stockinette st, until hat measures 7.75 (9) inches.
    Decrease row: *K1, K2 tog; repeat from * across row.
    Work even for 1 more inch.
    Decrease row: K2 tog across. Purl 1 row. K2 tog across last row. Cut yarn, leaving a 30 inch tail.

    Finishing:

    Thread the yarn needle with the tail of the yarn and draw the yarn through the remaining sts twice. Pull yarn to form the crown of the hat. Seam the hat inside-out from the top down. Weave the remaining yarn into the seam for about an inch and trim. A small pom-pom may be added to the top of the cap.


    Messmerland Advanced-Beginner Knitting Pattern ©2007. Messmerland Patterns are free; not for commercial use.

    Stacks Image 323